Tiago 17:18 30th August 2011
Hi,
some days ago we talked about macro photography.
I got the lens inverter (52mm) for my nikon lens fix 50mm
i gave it a try and it transforms the fix 50mm (no macro) into a macro lens,
the result was quite nice, but very difficult to focus. But it isn't better then a orinal macro lens.
Maybe with an extention tube (i am waiting for one).
anyway, i am starting to build a light box to have a proper setup for macro shoots,
i got 2 old boxes (from PS3 and my toshiba) and start to build a box with windows from those 2.
i will put something at the windows, tissue paper or other material, dont now yet, but i will have to try
to see what gets better results.
anyone tried a light box before:
Examples:
http://ohsheglows.com/2011/01/26/how...e-a-light-box/
http://www.digital-photography-schoo...ive-light-tent
[Reply]
Harrison 20:42 30th August 2011
I've built many light boxes over the years. Best material to use is thin cotton or similar as it resists the heat from lights behind it. If you use paper or tissue paper it can start to singe.
You can also experiment with colours by using coloured gels over the lights. Also using daylight bulbs is better as it produces a purer light, or LED lights, but I've not tried those out yet myself.
Marco photography definitely is a great thing to play around with.
[Reply]
Tiago 12:13 31st August 2011
thank for the info,
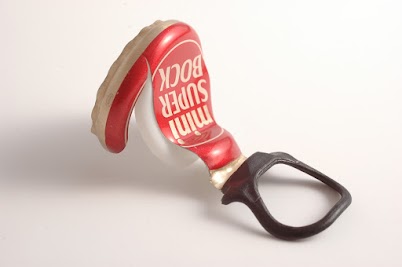
here is a photo i took yesterday in the light box, not yet ready the box, but half of it...
i can have a lot of light inside ony with 1 light source, i have some trouble with the background white color, i wanted pure white, but when
i got that pure white, colors in the object tend to go in the same direction...
I need a lot of time to learn...
anyway here it's a first experiment:
 [Reply]
Harrison 13:25 31st August 2011
You need to set the white balance in your camera to the background lighting in the scene/box before you begin, then add the objects you wish to photograph.
A very simple solution to this is found in this video:
[Reply]
Tiago 17:56 31st August 2011
Tiago 08:54 2nd September 2011
Ok, i did the white balance, went to the WB option and shoot a white wall, the result was much better !!
I shoot the same object, check it out:
before white balance setup

after white balance setup

the links were not working now i think they do...
I still have to get new lights, the one i have in the right side is very good, but the left one is to soft for it.
but it's getting much better.
thanks Harrison... that video was good.
now i must learn and check out the differences in ISO setups
[Reply]

